
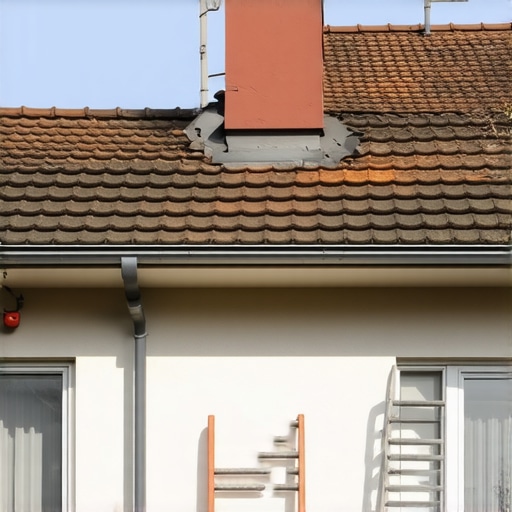
The Ghost in the Attic: Why Your Ceiling is Leaking Three Years Later
You’re sitting in your living room in Phoenix or Las Vegas, the AC is humming, and suddenly you notice a faint, yellowish ring on the ceiling. It’s 110 degrees outside. It hasn’t rained for three weeks, but that spot is damp. You call a few local roofers, and they give you the runaround about condensation. But I know better. I’ve spent 25 years crawling into attics that felt like pizza ovens, and I can tell you exactly what happened: you’re a victim of the ‘Caulk-and-Walk.’ My old foreman used to say, ‘Water is patient. It will wait for you to make a mistake, and then it’ll invite its friends to the party.’ That mistake was likely a $500 flashing detail that your previous installer decided to ‘solve’ with a five-dollar tube of polyurethane sealant.
“A roof is only as good as its flashing.” – Old Roofer’s Adage
In the Southwest, we don’t just fight water; we fight the sun. The UV radiation here is a chemical buzzsaw. It eats plastic, it dries out wood, and it absolutely nukes standard caulking. When a roofer installs a tile roof or even commercial roofing like TPO, the transitions—where the roof meets a wall, a chimney, or a pipe—are the front lines. A professional uses metal flashing, bent and tucked into a ‘reglet’ cut. A ‘trunk-slammer’ uses a bead of caulk and hopes his warranty expires before the next monsoon hits. If you’re seeing issues, you’re likely dealing with the 3 critical flashing details most local roofers get wrong.
Mechanism Zooming: The Physics of the Failure
Let’s talk about thermal expansion. In the desert, a roof can hit 160°F during the day and drop to 70°F at night. That metal flashing is constantly growing and shrinking. If that metal isn’t mechanically fastened and properly counter-flashed, it relies entirely on the bond of the caulk. Within two years, that caulk loses its elasticity. It pulls away from the masonry, creating a microscopic gap. This is where capillary action takes over. During a heavy rain, surface tension pulls water into that gap. Once it’s behind the metal, it’s game over. It hits the plywood deck, finds a nail hole—a shiner that missed the rafter—and follows that nail straight into your drywall.
This isn’t just a minor leak; it’s a forensic crime scene. By the time you see the spot on your ceiling, that water has likely traveled ten feet from the actual entry point, soaking the insulation and rotting the valley or the cricket meant to divert water away from the chimney. I’ve seen TPO roofing projects where the installer skipped the termination bar at the parapet wall, thinking a thick bead of sealant would hold. It didn’t. Within 18 months, the membrane pulled away, creating a massive pocket for water to pool. You can see why the missing termination bar is the number one reason these systems fail early.
The Anatomy of a $500 Fix vs. a $5,000 Disaster
When I talk about a $500 mistake, I’m talking about the difference in labor and materials to do it right. Doing it right means grinding a half-inch deep line into the brick or stucco, inserting the metal flashing, and then overlapping it with a secondary counter-flashing. It takes an extra two hours and some specialized metalwork. Most roofers skip this because they know you won’t climb a ladder to check. They just smear ‘snot-on-a-shingle’ (black mastic or caulk) over the gap. It looks fine from the ground, but it’s a ticking time bomb.
If you have a tile roof, the problem is even worse. Concrete tiles are ‘shedding’ systems, not ‘waterproof’ systems. The heavy lifting is done by the underlayment and the flashing underneath. If the local roofers didn’t install the flashing correctly, water gets under the tiles and sits on the felt. In the desert heat, that damp felt bakes until it becomes brittle as a potato chip. Eventually, you end up with the hidden flashing gap that makes your tile roof leak. You might even find that your concrete tiles are slipping off the roof batten because the water has rotted the wood underneath.
“Flashings shall be installed in a manner that prevents moisture from entering the wall and roof through joints in copings, through moisture-permeable materials and at intersections with dissimilar materials.” – International Residential Code (IRC) R903.2
How to Spot the ‘Caulk-and-Walk’ Artist
Before you sign a contract for a new roof or a major repair, you need to be the person who asks about the transitions. Don’t ask ‘will it leak?’—they’ll all say no. Ask ‘how are you handling the counter-flashing on the masonry walls?’ If they don’t mention a reglet cut or a metal termination bar, they’re planning to use caulk. For commercial roofing, specifically TPO, ask for a ‘pull test’ or a ‘chalk test’ on the seams. If they hesitate, they’re cutting corners. I’ve documented hundreds of cases where a simple chalk test proved the installer missed a weld, and that’s exactly where the wind will eventually rip the roof off.
[IMAGE_PLACEHOLDER]
Another red flag is the ‘Dead Valley.’ This is where two roof slopes meet a vertical wall. It’s a high-volume water area. If they aren’t installing a custom-bent metal cricket to move water around that corner, they are relying on caulk to keep a swimming pool’s worth of water out of your house. It won’t work. The cost of doing it right during the initial build is maybe $500 in extra labor. The cost of fixing the rot and replacing the moldy drywall later? Easily $5,000 or more. This is why you must check for these 5 contract red flags before any work starts.
Final Verdict: Don’t Pay for Temporary Fixes
I’m tired of seeing homeowners get fleeced. If you find a water spot, don’t just call the first guy who pops up on Google. You need a forensic approach. Use the 10-minute garden hose test to isolate the leak yourself if you’re able. If the water appears only when you spray the wall transition, you’ve found the ‘caulk gap.’ Don’t let a roofer just add more caulk. Demand that they pull the tiles or the shingles, install proper metal flashing, and integrate it into the building’s envelope. Anything less is just an expensive Band-Aid that will fail when the next storm hits. A roof is meant to protect your largest investment; don’t let a $500 shortcut destroy your peace of mind.